Showing posts with label Tutorials. Show all posts

Sunday, October 31, 2010

Holiday Word Block Craft

I thought sharing one of my favorite Christmas crafts would be the perfect for the Holidays. I designed these for my Christmas table and they were a hit! You can make word blocks for any event and your guest will love them...they are great decor! You can also wrap them up with a bow for gifts as well.

My boys helped me make them...they love doing crafts with me!!


Here’s what you’ll need:

• 3 wooden blocks, I found mine at Hobby Lobby
• Scrapbooking paper of your choice, I picked Christmas paper
• Card stock for the letters
• Paint brush, sandpaper
• Mod Podge

 Here are a few simple instructions:
1. Cut your scrapbook paper to fit each block then mod podge the paper onto the block
2. Cut out letters using a cricut or pre bought letters from a craft store then mod podge them onto the blocks
3. Once it is dry use sandpaper to sand off the extra paper on the edges and glue the block together.

Viola...easy peasy!!

Fun Holiday Banner!!


Happy Holidays!!

Monday, October 25, 2010

Cupcake Recipe Of The Week~Margarita Cupcakes

Cupcake Recipe Of The Week~Margarita Cupcakes

My friend Pam over at Party Starters is hosting an its my party...create my party contest!! Pam would love suggestions on cupcake flavors, frostings, toppings, drinks, recipes & decorations. If anyone has any fabulous ideas you can post your presentation on your blog and send her the link! So I thought I would share these fabulous margarita cupcakes!!


Picture and recipe via Fun Stuff Cupcake


Margarita Cupcakes
1 package white cake mix
3/4 cup plus 2 tablespoons Margarita mix, divided
2 eggs
1/3 cup vegetable oil
1/4 cup water
1 tablespoon grated lime peel, divided juice of 1 lime
2 tablespoons tequila or lime juice
3 cups powdered sugar
1 tablespoon sparkling or granulated sugar
1 tablespoon salt (optional)
green and yellow food coloring
Lime peel strips (optional)


Combine-1 package white cake mix, 3/4 cup Margarita mix, divided, 2 eggs , 1/3 cup vegetable oil, 1/4 cup water, 1 tablespoon grated lime peel, divided juice of 1 lime whisk 2 minutes or until well blended.

Preheat oven to 350 and mix all ingredients, bake for 20 to 25 minutes and let cool.

Combine-tequila, remaining 2 tablespoons margarita mix and 2 teaspoons lime peel in medium bowl.
 Gradually whisk in powered sugar until desired glaze consistency.

Combine sugar and salt in small bowl, add food coloring, until desired shade of green is reached.

Spread glaze over cupcakes, dip edges in sugar-salt mixture, garnish with lime peel strips.

Happy baking, if anyone decides to bake these adorable cupcakes I would love to see pictures


Friday, October 22, 2010

Halloween Word Block Tutorial

I thought sharing one of my favorite Halloween crafts would be the perfect  for today. I designed these for my Halloween table and they were a hit for Halloween! You can make word blocks for any event and your guest will love them...they are great decor! You can also wrap them up with a bow for gifts as well.


My boys helped me make them...they love doing crafts with me!!


Here’s what you’ll need:

• 3 wooden blocks,  I found mine at Hobby Lobby for $1

• Scrapbooking paper of your choice, I picked Halloween paper

•  Card stock for the letters

• Paint brush, sandpaper

• Mod Podge


And here are a few simple instructions:

1. Cut your scrapbook paper to fit each block then mod podge the paper onto the block

2. Cut out letters using a cricut or pre bought letters from a craft store then mod podge them onto the blocks

3. Once it is dry use sandpaper to sand off the extra paper on the edges

 Viola...easy peasy!!


I
Don't forget to download our FREE Pink for a Month Breast Cancer Awareness Printables and Free Fall Collection Printables!!


Wednesday, May 19, 2010

Cake Pops, Cake Pops, Come and Get Your Cake Pops!!

Cake Pops, Cake Pops, Come and Get Your Cake Pops!!

The Two Savvy Sisters were vary daring and took a stab at baking cake pops for our mom's 50th party. I must admitted it took hard work and patience but it paid off...they were a HIT!!!


Our inspiration came from Bakerella.com they have amazing cake pops!!


Pictures from Bakerella.com


These lovely cake pops took forever to make but well worth it!!

We used cake mix, cream cheese, pink candy melts, and sticks.

1. First thing first is to bake your cake. I made two cakes...then cool.

2. Once the cake is cool crumble it up and add cream cheese to the cake.

3. Then make small balls out of the cake mix and place them on wax paper. Make sure the balls are not to big because they will fall off the stick. OOPPS we made this mistake lol!!

4. Then put the sticks into the balls and place them in the freezer for several hours.

5. Next put the candy melts in the microwave on low for 30 seconds stir and then 30 seconds again until melted.

6. Now time for the fun part!! Dip the cake into the candy melts, cover it and then make a spinning motion until you like how it looks.

7. Then stick them in foam so they will stand up straight next put them in the refrigerator.

8. Once they are hard you can tie ribbon around the stick, placed them in a vase with foam or whatever your little heart desires!

They went soooo fast, everyone LOVED them!! The cream cheese made them so YUMMY!!


Happy Baking!!

Friday, April 16, 2010

Laying Sod

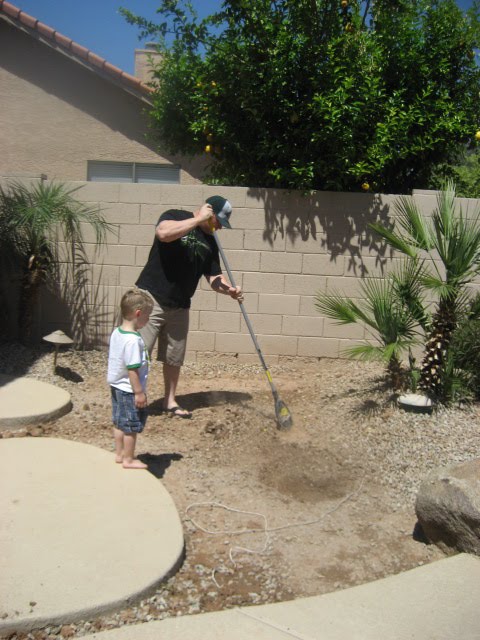
We finally finished our sod project that has been going on for about a month now. We or should I say I decided I wanted to lay it myself, well my hubby knows what that means...yes he will end up helping!! Yes that is him doing all the work, not me lol!!
First thing we did was shovel all the rock up, I actually did do this. Once we had all the rock up we added fill  dirt and sand so that the ground was even. The next step was to put in the edging which was very simple.


Yes that is me working in a skirt, hey a girls gotta try and look good sometimes :)


Once we had all the edging done we layed out the sod, we had to cut some pieces to fit correctly but for the most part is was an easy project. Now we just have to keep watering it and try and stay off of it for about a week. I am so excited to finally have grass for our puppy and kiddos to play on...it only took us a year to do!!


Here are 5 tips on how to water your lawn:


Water requirements: The amount of water your lawn needs will depend on a range of factors. These include the type of grass, the climate and season, the soil, and how green you want it to be as well as how well you maintain it. In the growing season, you’ll need to give the turf around an inch of water per week to sustain growth and keep it green. You can get away with a good deal less than an inch if you choose a drought resistant variety of cool season grass. Some warm season grasses are less thirsty too. In general, though, watering more will encourage the roots to grow deep where there’s more moisture, resulting in a lusher, healthier lawn.

Water supply: Most of your water should ideally come from rainfall. You’ll probably have to use sprinklers or an underground irrigation system as well, however. If your water comes from the city it will cost you money to water your lawn, while a well on your property means it will be free. A lot of municipalities have now instituted curbs or even bans on watering during a drought, so some of us have to let our lawns go brown until the rainy season starts again. In these cases, we have to accept that the grass can’t be as green as we would like all year round. However, using a sensible lawn care program will help ensure that the lawn survives a temporary drought.

Sprinklers and irrigation systems: Sprinklers can be moved around, while an irrigation system sits permanently under the turf. Whichever setup you have, you must ensure that you get adequate coverage by overlapping the spray areas. You can buy cheap, movable sprinklers, or invest in an automatic system with a computerized timer that you can set to suit your needs. As long as you use it wisely, an automatic sprinkler system is the most efficient way to get an evenly watered lawn when it’s not raining.

How often should you water?: It’s better to give the grass a good, long drink once or twice a week than to provide a little bit of moisture every day. In this way, you mimic normal rainfall and allow the grass to grow deep, strong roots that help it survive a dry spell. If you water little and often, you’ll end up with grass that has shallow roots and is generally weak.

Best time to water the lawn: If you have a system with an automatic timer, program it to run sometime between 3 a.m. and 6 a.m. If not, try to water as early in the morning as possible, before the sun gets hot. A lot of people water the garden in the early evening, but you should only do this if you have no other option since it can make the lawn prone to disease. Don’t be tempted to saturate the lawn during the hottest part of the day to cool it down, as most of the water will simply evaporate.


Monday, April 5, 2010

New Custom Frames

This week I purchased a few blank MDF frames for $1.99 at Michaels. I always thought they were a great idea, but I never really did anything with them, until now. I like my crafts cheap, easy and fast, this project covers all three. Today we will be working with: 1 blank MDF frame (or any flat frame), decorative scrapbook paper, scissors, small screw driver, paint brush, paint and Mod Podge.


I placed my scrapbook paper face down on a table and traced it. I then cut paper along the outlines.I then painted the entire frame with two coats of paint that coordinated with the scrapbook paper that I was using. I used a blue on one frame and green on the other. After the paint was dry, I brushed Mod Podge on the face of the frame and placed the paper face up on top of the Mod Podge. I pressed down on the paper with my hands and rubbed all over it to avoid air bubbles. After the Mod Podge was dry, I brushed Mod Podged over the top of the paper and the sides and back of the frame, then let it dry. For my flower frame, I took a two flowers and hot glue them onto the front of the frame. Walla! I love my custom frames.


This frame is going into my son's room it matched the rest of the decor in his room.


Saturday, April 3, 2010

Wall Display Book Shelf

I decided to try and make my son a fun little book shelf for his room. This was a very easy and very inexpensive project that I think turned out really cute.

All you'll need is:
2 1X3's 24 inches long (or however long you want) - $0.50 from Home Depot Scrap section
1 12 inch plaque from Michaels - $1.47
1 set of wall hangers - $2.29
1 wooden dowel (mine was 7/16") - $0.99

Step 1. Nail your 2 1X3s in an "L" shape
Step 2. Cut the bottom off of your plaque so that you have a flat bottom. Then put it up against your "L" to see where you need to cut vertically so that it will be flush.

Step 3. Nail the sides onto the "L"
Step 4.Cut your wooden Dowel Rod and nail this in place too.
Step 5.Paint them and screw on your wall hanger:


I also wanted to dress it up a little bit, so I bought some paper and added it with modge-podge...love how it turned out!!


I also mod-podged his name with the the same paper...I just have to hang them with some matching ribbion. My next project is some home-made picture frames to match!!


I am linking up to....

Somewhat Simple's Strut Your Stuff Thursday
Domestically Speaking's POPP
Blue Cricket Design
Trendy Tree House
Reinvented's Trash to Treasure
The Shabby Chic Cottage's Transformation Thursday
100 Ideas Under $100 @ Beyond the Picket Fence
Frugalicious Friday @ Finding Fabulous,
 Saturday Nite Special @ Funky Junk


Join us Saturdays at tatertotsandjello.com for the weekend wrap up party!


Thursday, April 1, 2010

Kitchen Cabinets Makeover

YAY! Our kitchen redo is almost over!!! My favorite part of the redo was painting the cabinets white. If I must I will show you a before picture of the kitchen :)

Before

we started the makeover by taking all of the cabinet doors off and sanding down every single part of the cabinets. We then started to prime all of the cabinets. Once the primer dryed we started with our SUPER white paint. We put two coats on all of the cabinets. I had a blast painting the doors late at night while I watched my soap All My Children...I heart TIVO!!

After


Once the painting was finally done YES!! we put all the knobs and handles on the doors and oohhh la la Our brand new kitchen cabinets are finally done :) it only took us two months!


All that is left to add to our new kitchen is the butcher block counter tops that I want soooo bad...hopefully soon!!!


I am linking up to....
Sunday Scoop
Somewhat Simple's Strut Your Stuff Thursday
Domestically Speaking's POPP
Blue Cricket Design
Trendy Tree House
Reinvented's Trash to Treasure
The Shabby Chic Cottage's Transformation Thursday
100 Ideas Under $100 @ Beyond the Picket Fence
Frugalicious Friday @ Finding Fabulous,
Saturday Nite Special @ Funky Junk
DIY Show off
Metamorphosis Monday
Motivate Me Monday
Chocolate Sundaes